There are several yoga postures that bring me back to my childhood. Ūrdhva Dhanurāsana or Upward Facing Bow is one of them. Before a growth spurt and the busy life of middle school I was a dedicated gymnast. I have vivid memories of front walk-overs, back handsprings, and other bendy tricks on the floor and beam. With the pliable body of a tween, these were easy and fun shapes to create with my body.
Fast forward many years and things are a lot different. Now, I have to be really primed and prepared to find this posture. Creating opening through the front of the body (psoas, hip flexors, and quads), fostering mobility in the back, and softening through the shoulders must happen before I can even think of attempting this posture. The good news is that when I do the prep work, the pose feels really good, a sliver of what I remember. Each day it’s a new and different experience. Partly because of a maturing body, but probably more because of a maturing soul. I have grown to appreciate the deep heart opening and energy that comes with the practice of Ūrdhva Dhanurāsana.
Try these variations to find comfort and expansion.
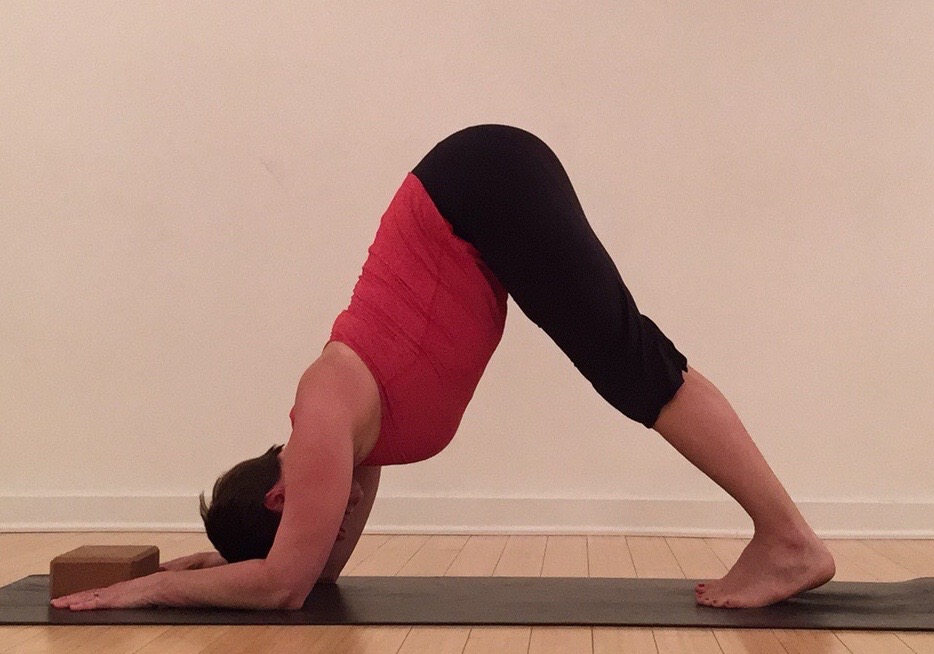
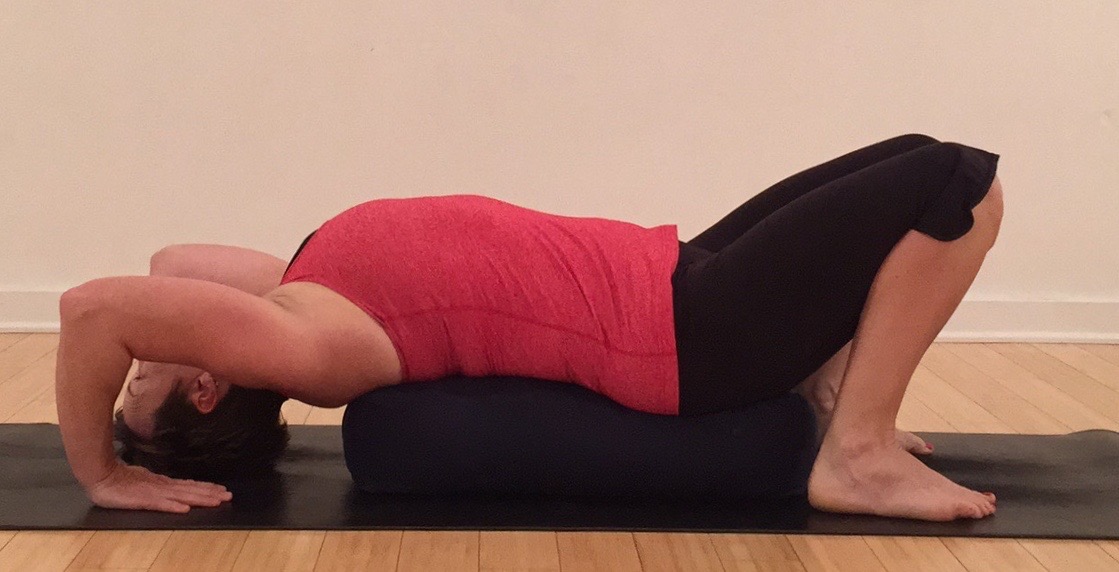 Option 1 – Bolster Support. One of the earliest hurdles to this pose is get the first few inches off the floor. With the arms in a rarely found position it can be difficult to tap into their strength. By elevating the torso on one or more bolsters, the first few inches is bypassed making the press up a little more accessible. Start with the back on a bolster or large pillow. With the hands at shoulder width or slightly wider point the fingers towards the shoulders. Shrug the shoulders onto the back. Place the feet at hip distance or slightly wider with the toes pointing forward in line with the knees. Press away from the bolster. Try to keep the alignment of the knees and legs with a gentle hug to the midline. Do the same with the arms and the elbows. Find a balance between hugging the knees and elbows in and the straightening of the legs and arms. Take a few breaths and then lower back to the bolster with control.
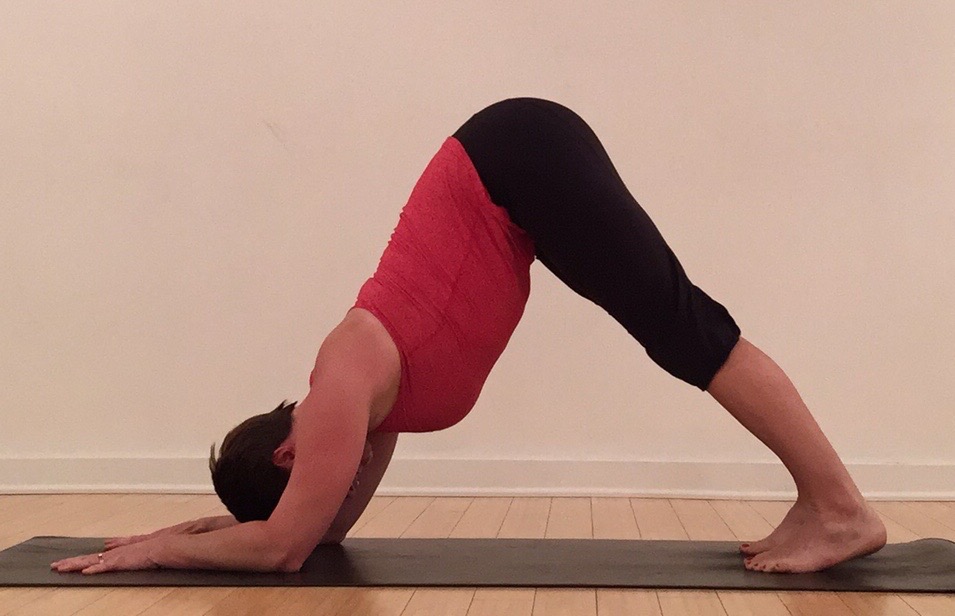
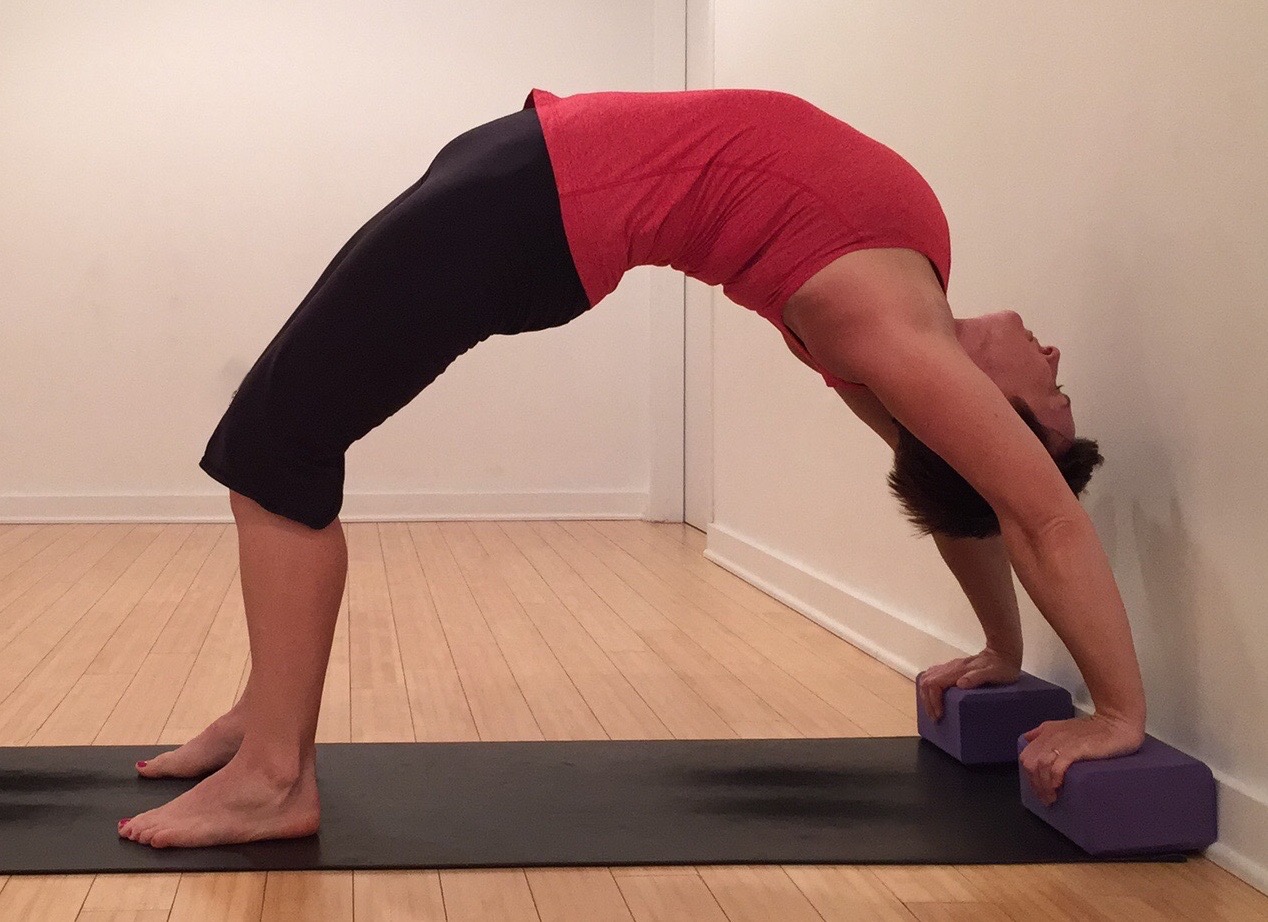 Option 2 – Block Support. Place two blocks against the wall about shoulder width apart leaving space for your head. Lie back with the head a few inches from the wall. Place hands on the blocks with the fingers over the edges. Place the feet hip distance with ankles stacked under knees. Press away from the floor, first coming to the crown of the head. Keep enough pressure in the hands and feet, so the head gently touches. Realign the elbows, shoulders, and knees then press up as much as you can. You may still have a bend in the knees or elbows. Be mindful to keep the back long, reaching the tailbone toward the heels, so you are not crunching the low back. Stay for a few breaths, lower to the crown of the head, then to the floor.
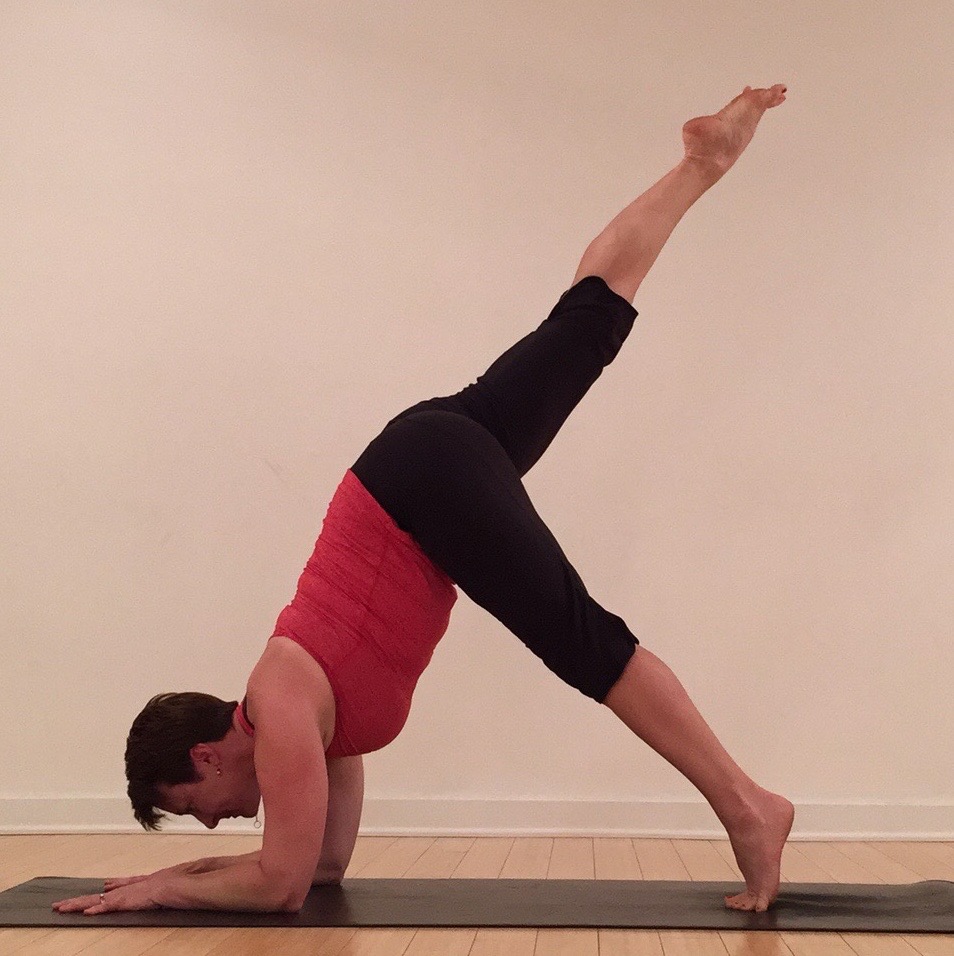
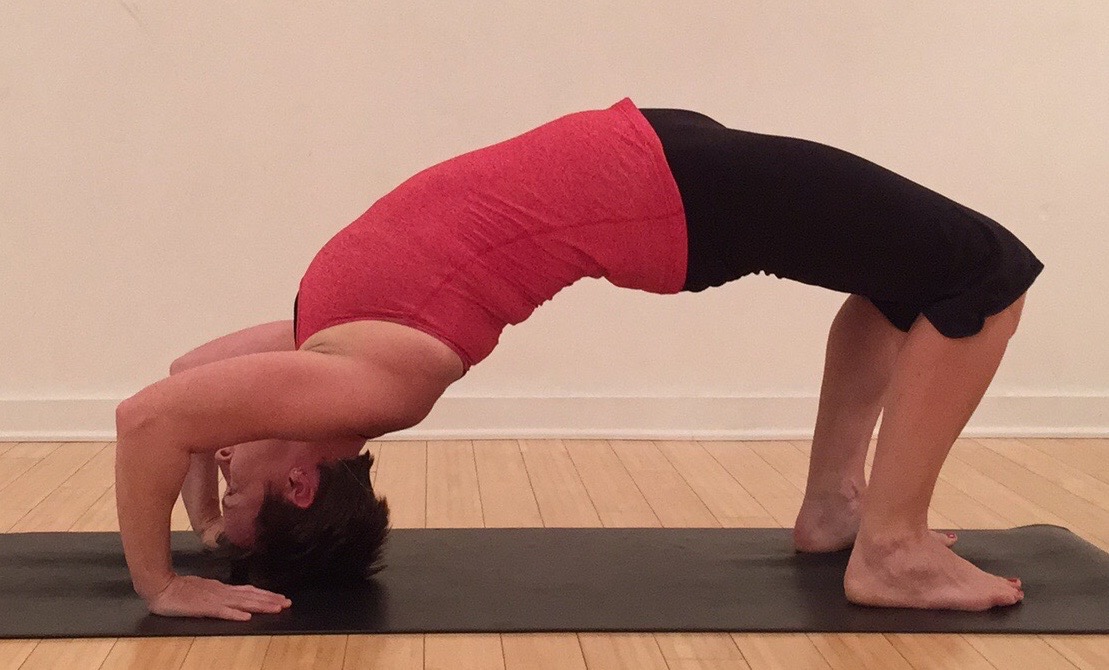 Option 3 – Press Up. When the wrists are strong enough, move away from the wall and place the hands flush to the mat. Roll the traps away from the base of the neck, then press to the crown of the head. Pause for a moment, hug the elbows to midline as you roll shoulders away again. Press up finding as much expansion in the arms and legs as you can. For more challenge, as you exhale lower with control to tap the crown of the head, then inhale and press to the back bend. Repeat several times to build strength and stamina.
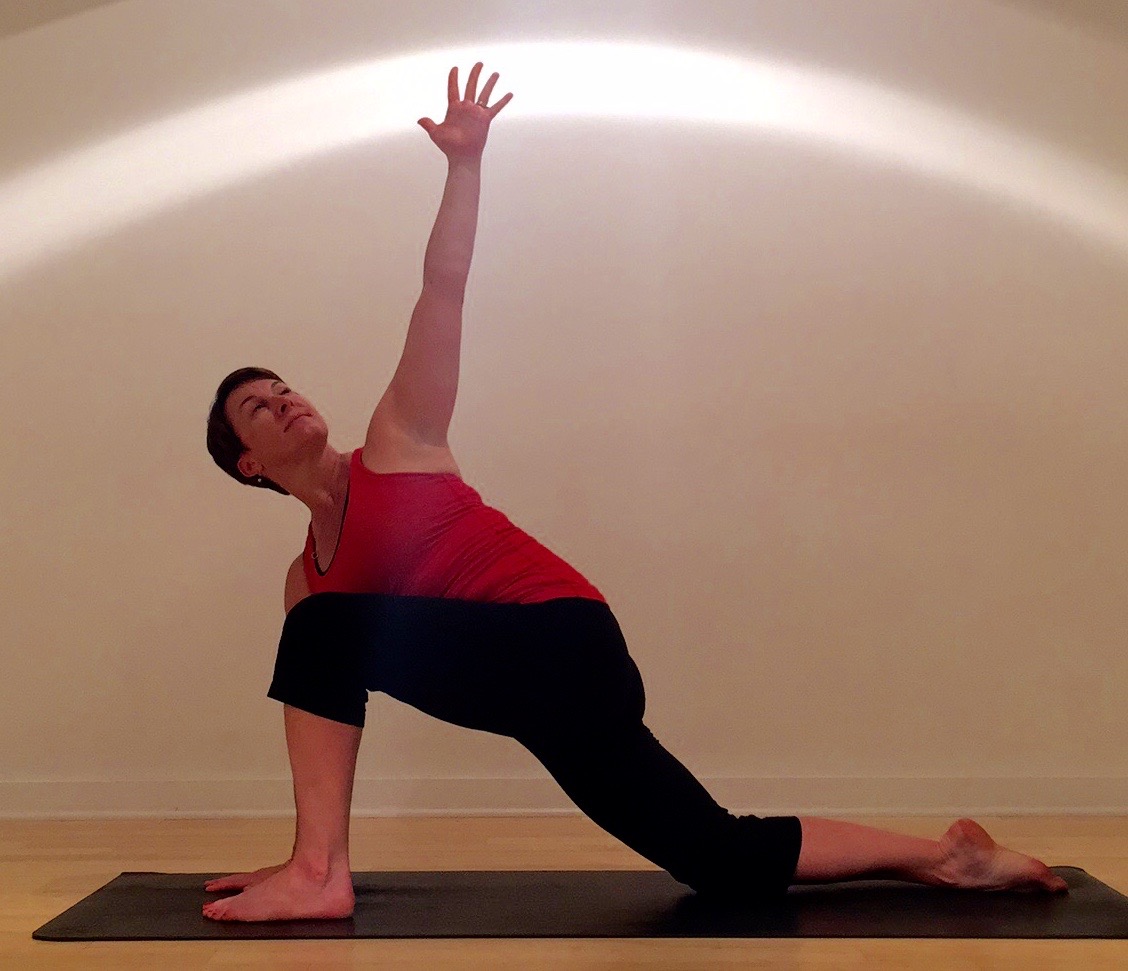
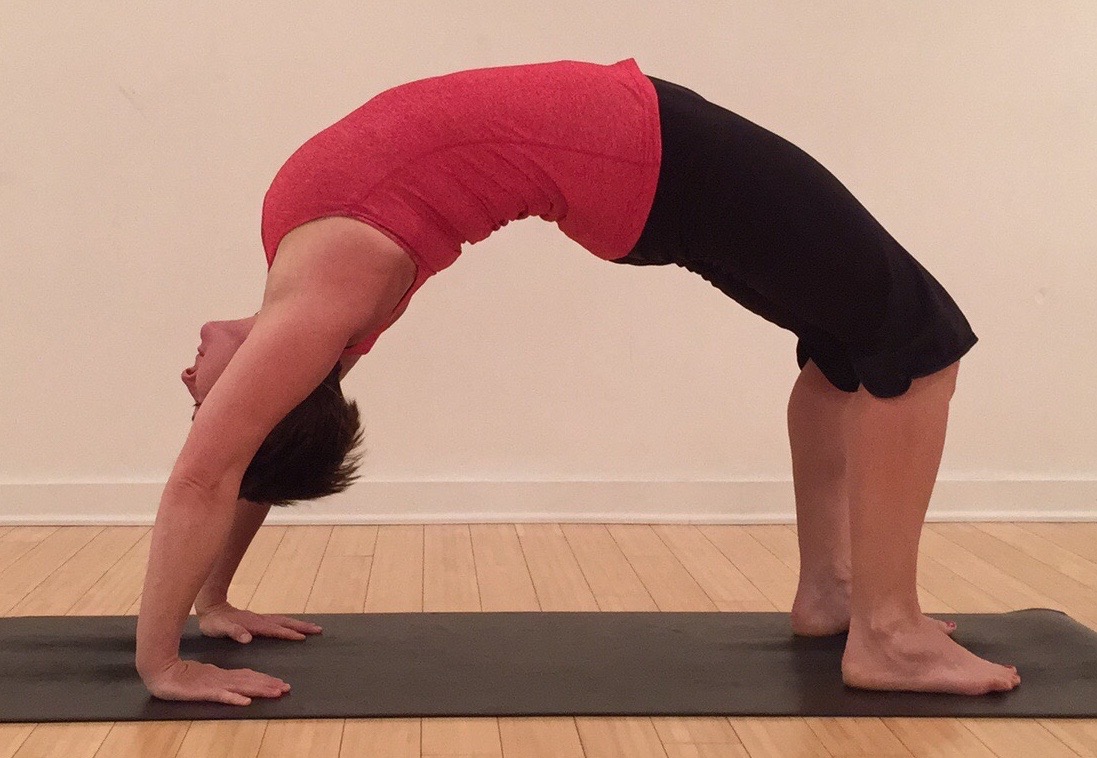 Option 4 – Ūrdhva Dhanurāsana. Work on the previous stages until you can straighten the arms and legs fully. Keep the shoulders moving down the back and the tailbone reaching toward the heals. Reach the crown of the head in between the hands to keep the neck long. Press evenly into all four corners of the feel and resist the temptation to clench the toes or the jaw. Press through the front of the heart as if it could burst from your chest. Find full deep relaxed breaths. When you return to the ground, pause without movement to enjoy the energetic rush of the back bend. Follow with an open twist or knock the knees together.
I don’t know if Upward Bow will ever be as easeful as it was when I was a kid. It really doesn’t matter. I’m just happy I can appreciate the pose I can find in my body today and the heart opening that comes with it.
Honor the body that you are in today! However you decide to practice be sure to work at a level where you are challenged, but also where you are keeping your body safe from injury. Follow this #PowerPose challenge @suzannewrightyoga on Instagram or at Suzanne Wright Yoga on Facebook. If you post your pictures or about your experience be sure to tag #PowerPose and @suzannewrightyoga.